8 Nd:YAG laser safety rules for tattoo and PMU removal
Eye protection for client and operator, no mirrors, handpiece and pedal control, the right tip, no alcohol: safety rules for working with an Nd:YAG laser.

Everything in a laser removal specialist's work has to be high quality: from the equipment they use to the service and the result. It is not enough to buy yourself a mega-super-cool laser — you also have to learn how to handle it properly! However wonderful the device is, it will not work on its own — you take on all the responsibility.
During a PMU or tattoo removal session you need to follow a number of rules that make the procedure safe both for the client and for you. I have been doing laser removal for 12 (!) years now, and over that time I have built up an enormous amount of experience.
At the start of my career in laser removal I had to learn from my own mistakes, and now I want to help you avoid the slip-ups I made. So I have prepared this article, in which I describe in detail the most important safety rules for working with an Nd:YAG laser.
So, let's begin!
Rule #1: Always put protective goggles on your patient
Some artists neglect this rule, saying something like "Why does the client need goggles? I work carefully and I won't hit the eye!" But working without protective equipment is strictly forbidden, because no one is immune to accidents. The slightest shift of the laser beam — and your client has a serious eye injury.
To keep the risk of damage to the eye area to a minimum, please put protective goggles on!
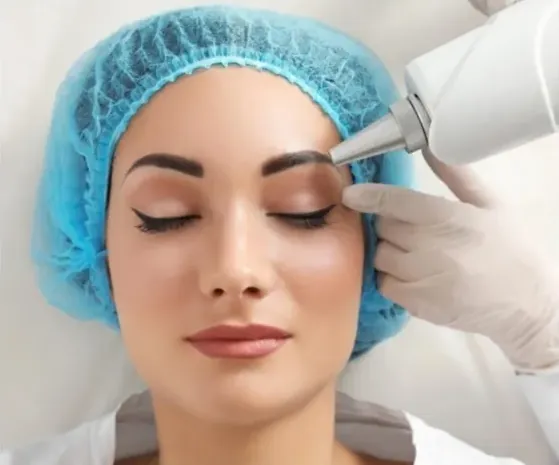
Dangerous! (no protective goggles)
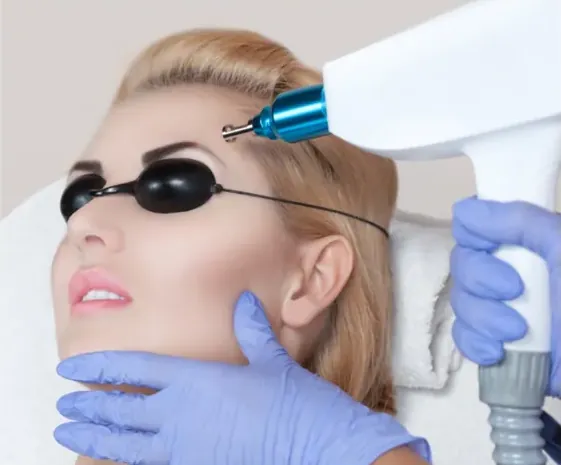
Safe! (wearing protective goggles)
Rule #2: There should be no mirrors or exposed glass surfaces in the treatment room
Remember the scene from "Star Wars" where the characters fire lasers in every direction? The same thing will happen if you accidentally point the laser at a mirror or a glass surface: the beam will certainly be reflected and hit some random object (or even your patient). So I strongly recommend getting rid of such things in the room where you carry out the procedure!
Rule #3: When working with the laser, always watch where the handpiece is pointing
If you do not need the handpiece at the moment, it should be in its standard position: on the laser unit. If the handpiece is in your hands, try to keep it pointed downwards at all times, resting it either against the treatment couch or against yourself.
This is how you keep control over the direction of the laser beam. The beam has a damaging effect up to 200 metres from the source of radiation (the laser), so the consequences of careless handling of the handpiece can be very unfortunate.
Rule #4: The specialist must also wear protective goggles during the procedure
There is a belief that the operator does not need protective goggles for the 1064 nm wavelength. Well, that is not true — you must always wear them! Laser equipment often comes with goggles for the operator, but they do not all protect the eyes from radiation equally well. How can you check? There is a simple way to find out whether your goggles are effective against laser exposure or not.
You can see how the experiment works in this diagram:
- Protective goggles
- Nd:YAG laser
- Two strips of dark paper
Then check whether the laser radiation has damaged the paper
The goggles give poor protection
You can safely use these goggles
Rule #5: Keep control of the laser foot pedal
Picture the situation: you are completely ready for the laser removal procedure, the handpiece is in your hand, the patient is in front of you, and all that is left is to press the pedal. You raise your foot over it and... get distracted. Someone calls you, there is a knock at the door, or you simply lose your balance — but the laser system has already fired.
You were not looking where the laser beam was pointing, and it can hit anything, including you or the client.
Here is another example: you are ready to start working, but the foot pedal is far away. Immediately drop the thought "Right, I'll just carefully nudge it closer with my foot and that's it!" Been there, done that. You will definitely press it by accident and set the device off.
It is good if the pedal has a protective cover that prevents this kind of accidental pressing. But if it does not, be very careful about how you switch the laser on.
Rule #6: Pay attention to the focusing tip on the handpiece
It happens that after a session you forget to change the handpiece tip before the next appointment. For example, you had a 532 nm focusing filter on, and the next patient needs 1064 nm, but you did not change the tip and started working. What can this lead to?
First of all, additional damage and injury to the skin. Sometimes you remember about the wrong tip almost immediately, and sometimes only halfway through the procedure. For this reason I advise using tips of different colours so you can tell them apart and not mix them up. Some laser devices even have a warning so you can make sure the correct tip has been selected.
Rule #7: Do not use alcohol to prepare the skin
Twice in my practice I have run into this problem: in a hurry, I quickly disinfected the patient's skin with alcohol and fired a pulse. The result: a stressful situation, because I was literally "setting fire" to the skin.
Remember, the client has booked a laser removal session, not a fire show. There is no need to use alcohol, and I ask you to rule out applying it to the patient's skin completely!
Rule #8: Use modern and reliable laser removal equipment
The newest, high-quality equipment is also a significant factor in the safety of the procedure. An Nd:YAG laser is a hazard class 4 device (the highest class in Russia!), which means it must meet all the requirements for safe operation.
Modern devices have a whole range of options that minimise the risks during laser removal. New, technologically advanced lasers have a bright pilot aiming beam, so you can clearly see where the laser is pointing. Modern devices also have an "emergency button": if you need to stop work urgently, it comes in very handy.
Before starting a laser removal session, you have to go through several steps...
Switch the device on with a key
Go through all the settings in the menu and activate the simmer
Activate the pump lamp
Get a notification that the correct handpiece tip has been selected
Press a pedal that has a protective cover
Receive a warning signal that a pulse is being generated
All of these are precautions to protect you and the client from unwanted incidents. So my recommendation is: do not skimp on laser equipment, and invest in the quality of your services.
Bonus rule: Learn, learn and learn some more!
Now you know the safety rules that will help you avoid injuries and mistakes during laser PMU and tattoo removal. I hope you will take these recommendations on board and put them into practice!
Check yourself
Tick the rules you already follow.
Frequently asked questions
Is an Nd:YAG laser safe for tattoo and PMU removal?
An Nd:YAG laser is a hazard class 4 device, so safety depends on the rules you follow: goggles for the client and the specialist, no mirrors or exposed glass in the room, control of the handpiece and foot pedal, the correct tip and no alcohol on the skin.
Does the client need protective goggles during laser removal?
Yes, always. Working without protective equipment is strictly forbidden, because the slightest shift of the laser beam can give the client a serious eye injury.
Does the operator need goggles for the 1064 nm wavelength?
Yes. The belief that the operator does not need goggles for 1064 nm is not true, and the goggles supplied with a device do not all protect the eyes equally well.
Can you disinfect the skin with alcohol before a laser pulse?
No. Firing a pulse on skin disinfected with alcohol literally sets fire to it, so rule out applying alcohol to the patient's skin completely.