Burns after laser tattoo removal: a case study
Blistering burns after laser tattoo removal: a real case. How we healed them without scars, why it happened (anaesthetic under film) and what we learned.
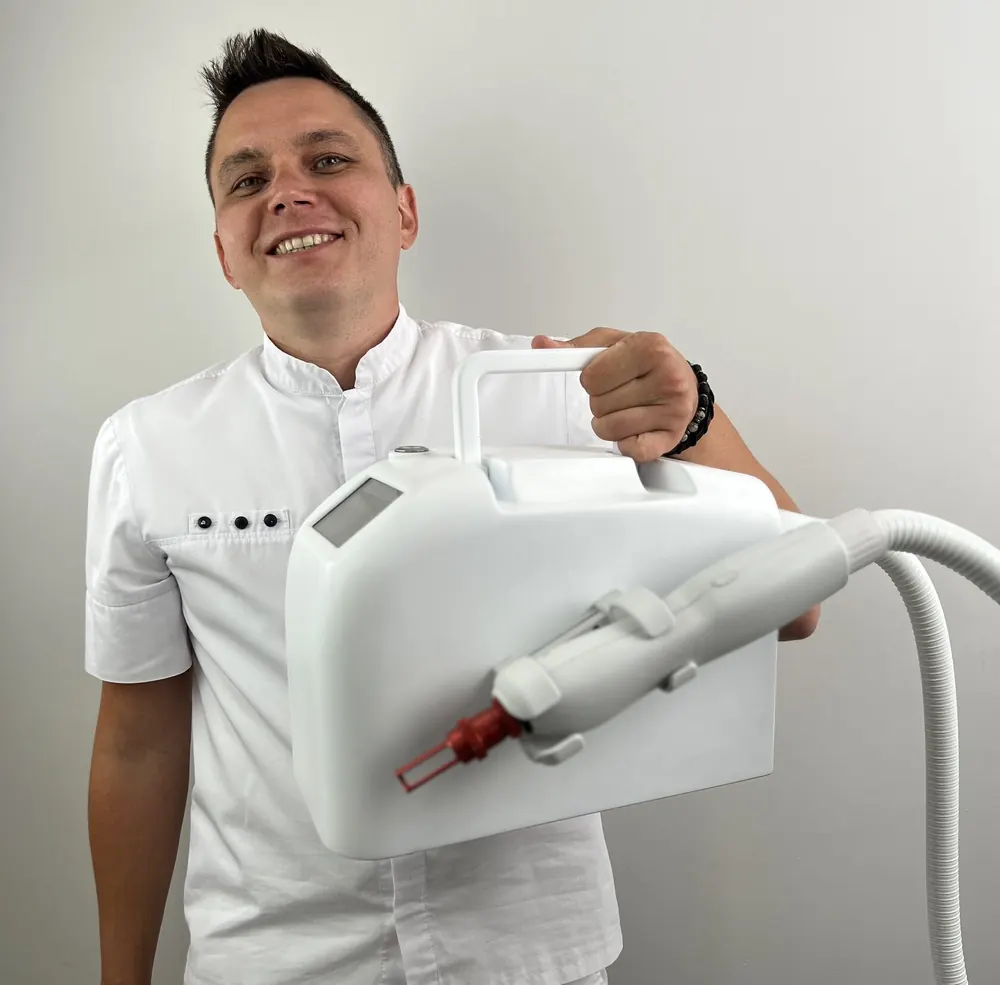
I want to share a very interesting case from my practice with you.
A case study (from the English word "case", meaning "circumstances") is a real case used to examine theoretical ideas.
On my YouTube channel I often go through various complications of tattoo and PMU removal. These include burns and, as a consequence, scars after inappropriate treatment with Nd:YAG Q-switched lasers. Unfortunately, I am no exception, and I also run into complications in my work from time to time. I do not want you to think that anyone is immune to risk when working with Class 4 lasers in situations with an incredible number of variables.
If someone tells you they "guarantee 100%" that there will be no skin damage or complications, and that these never happen, they are seriously mistaken.
So, here we go.
Not for the faint-hearted!
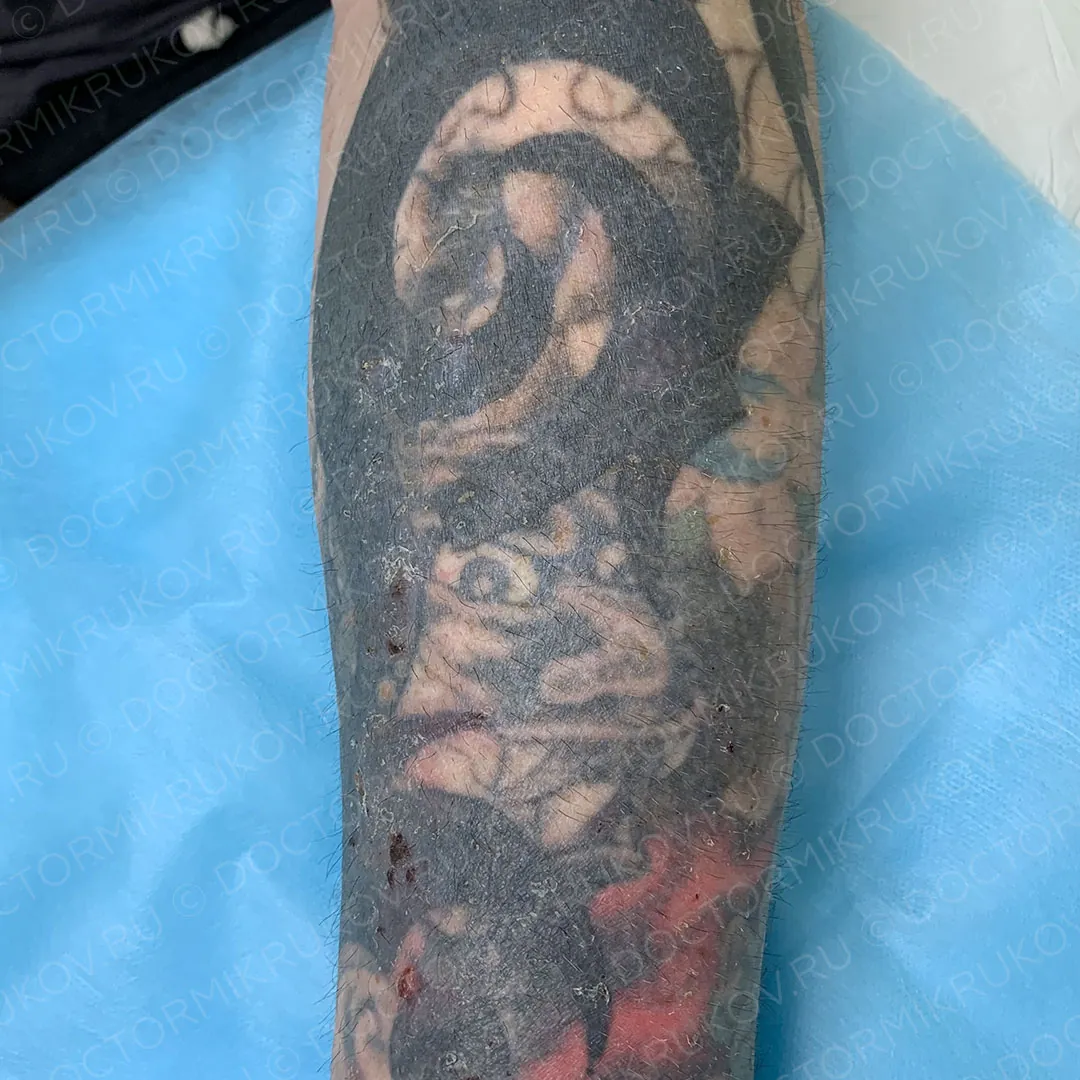
Patient L. came to us to have a tattoo lightened before a cover-up. The first laser treatment was in October 2018, at our medical centre, with no complications. A repeat laser treatment was carried out under visual control of the skin's reaction, in the form of "frost" (frosting). During the treatment, a Zimmer Cryo 6 cryo unit was used over the whole area treated with the laser. During the procedure we also used the "Step-by-Step" method of cooling the areas already treated one by one with cold packs. After the treatment was finished, contact cooling with cold packs was applied over the whole treated area for 30 minutes.
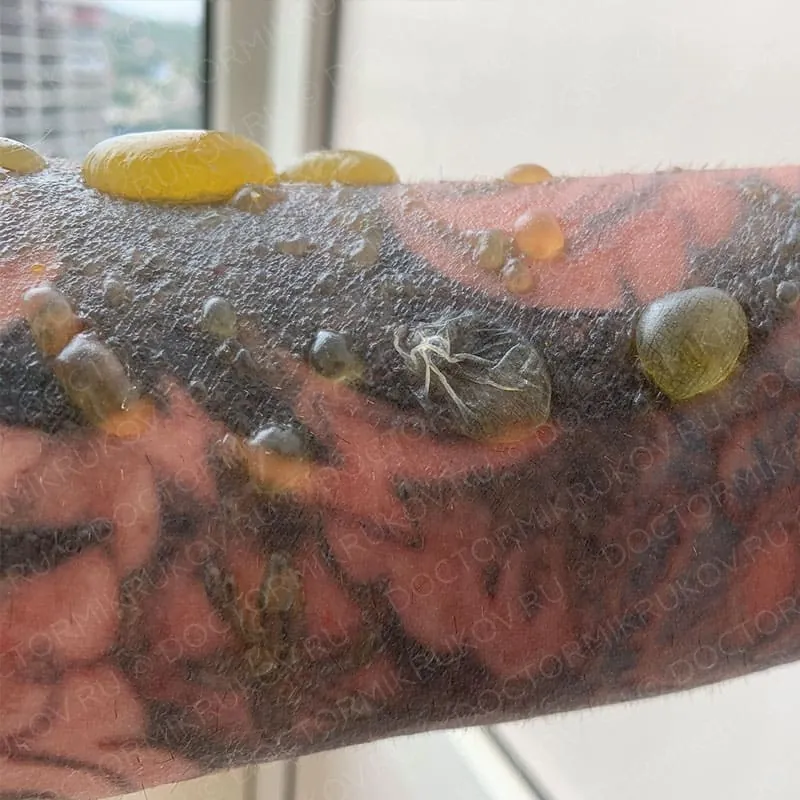
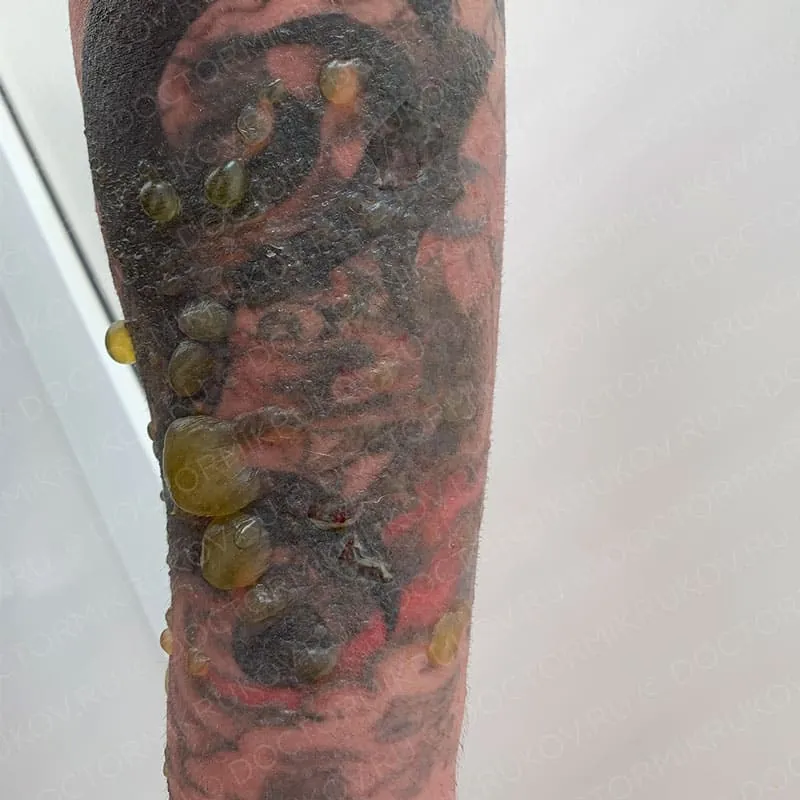
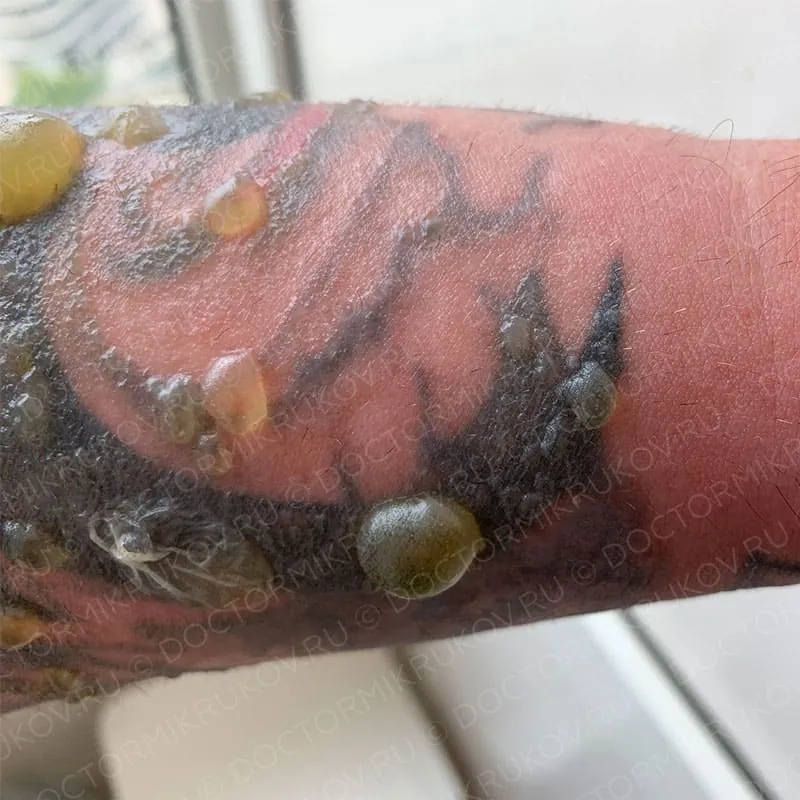
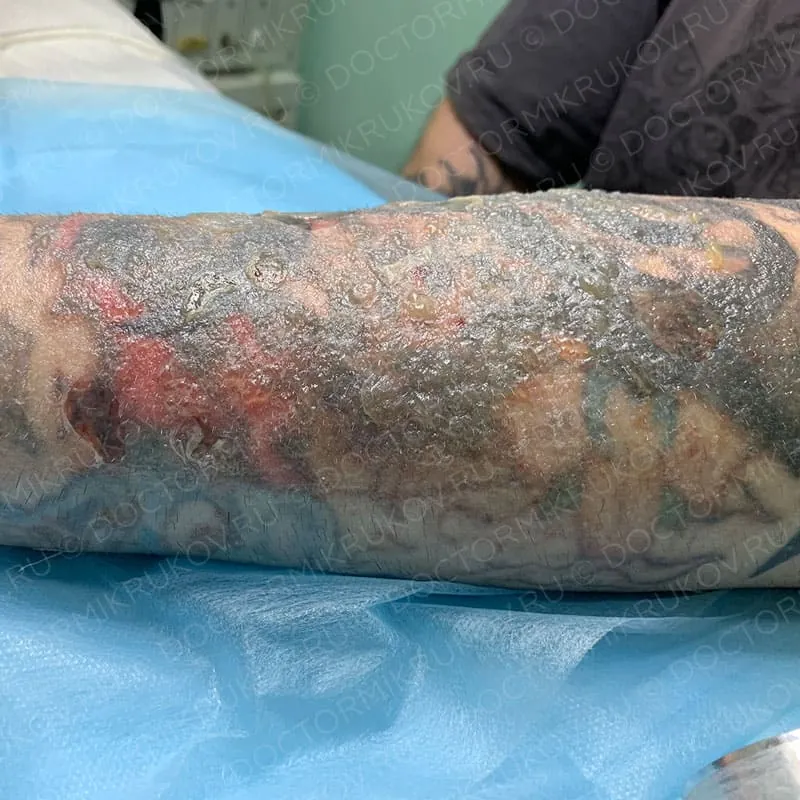
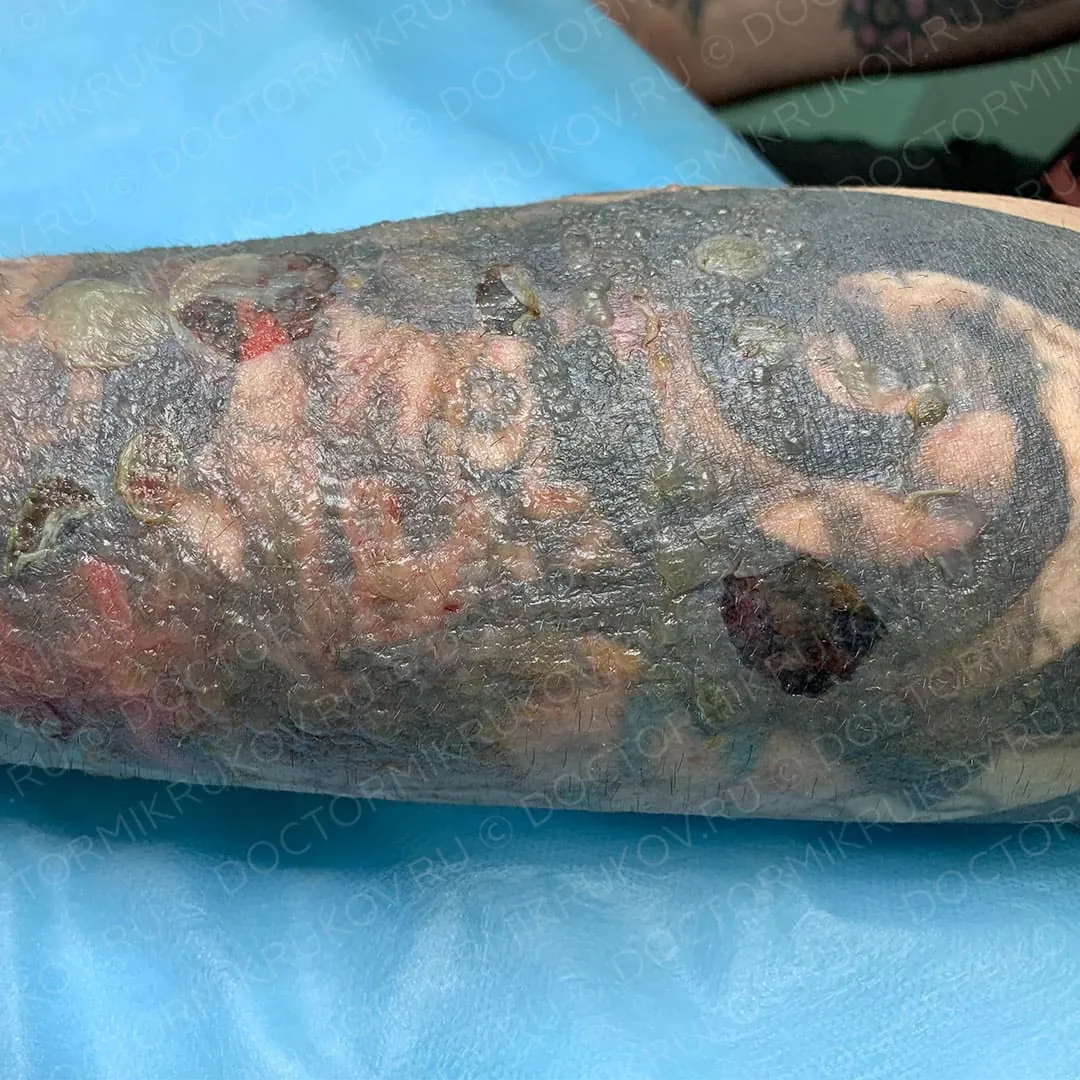
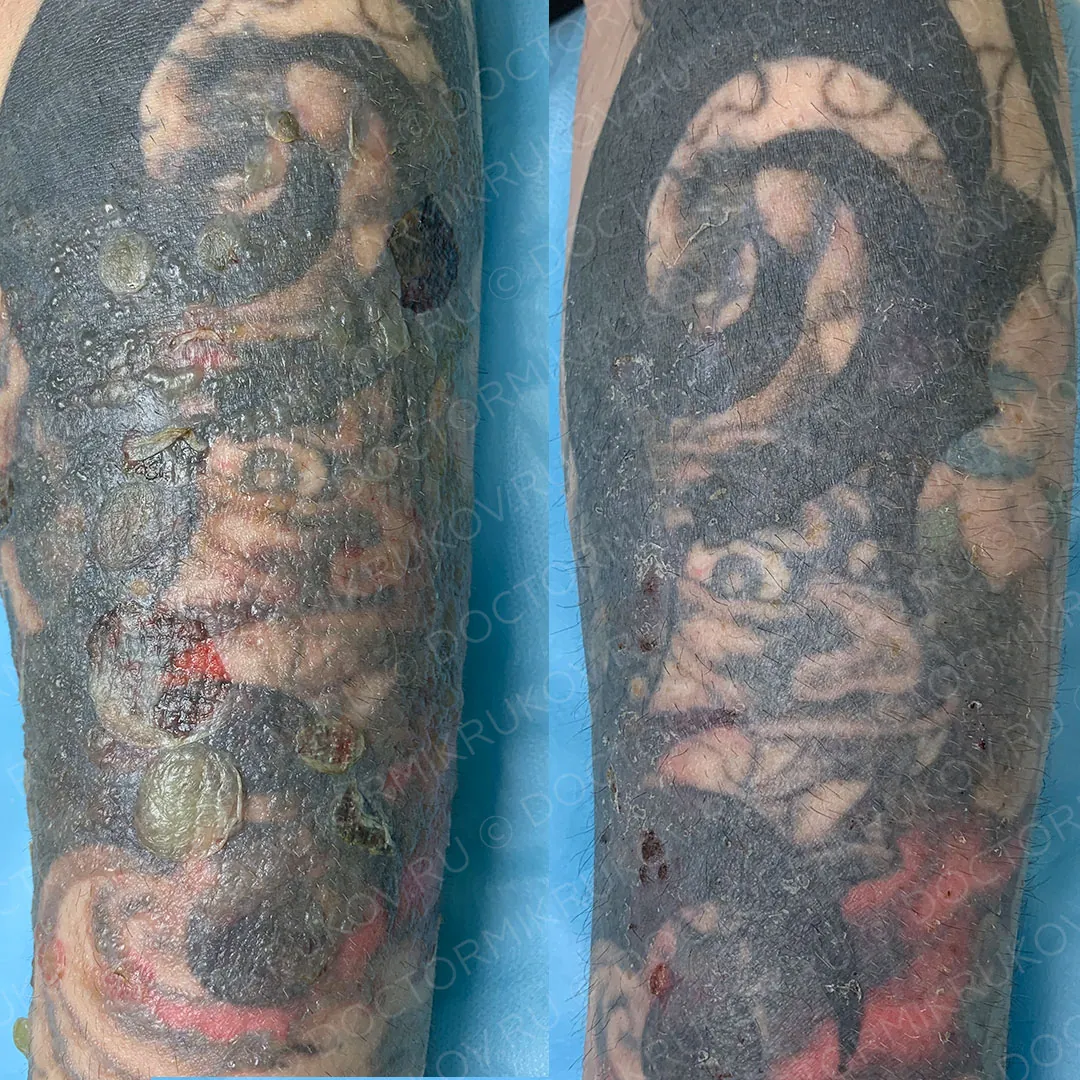
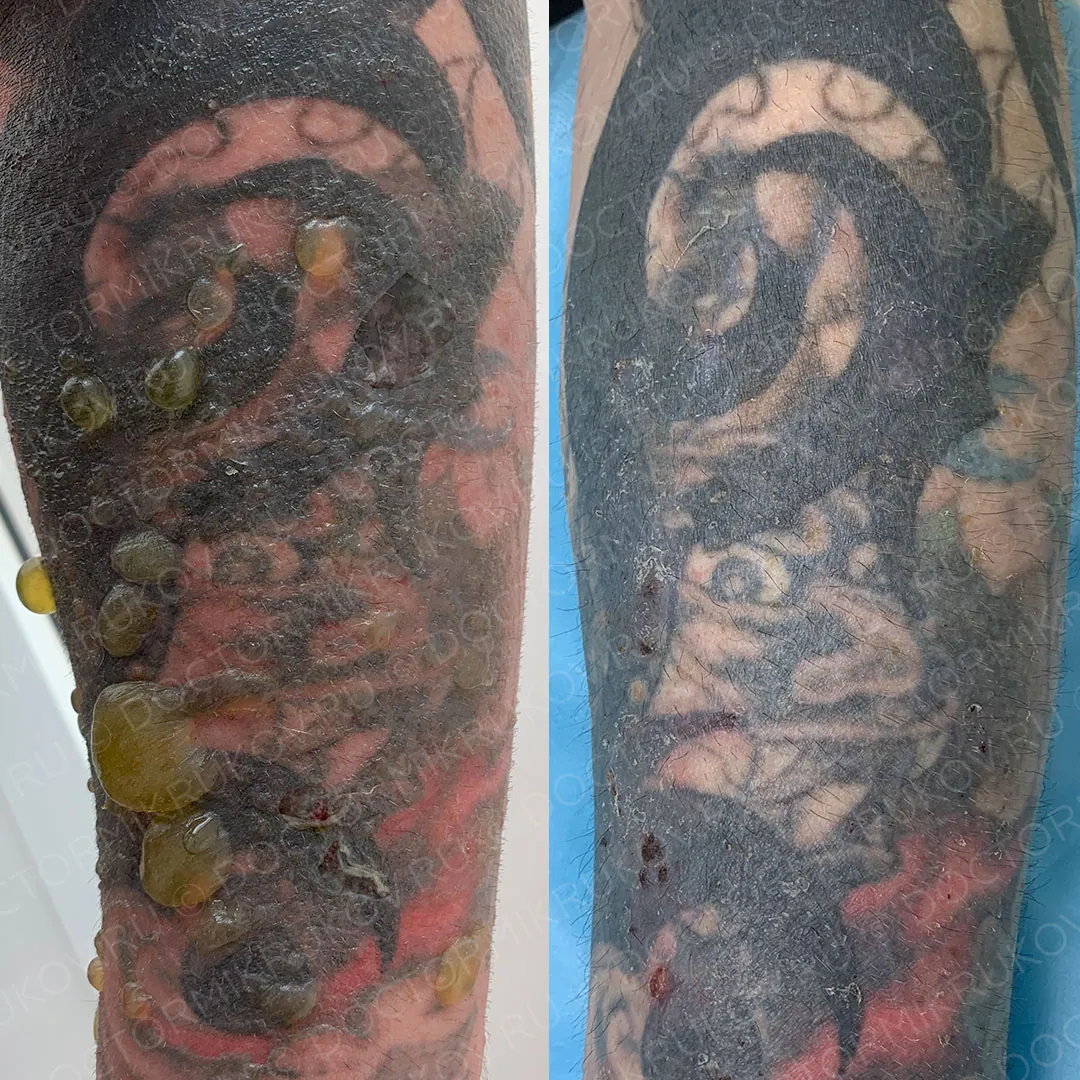
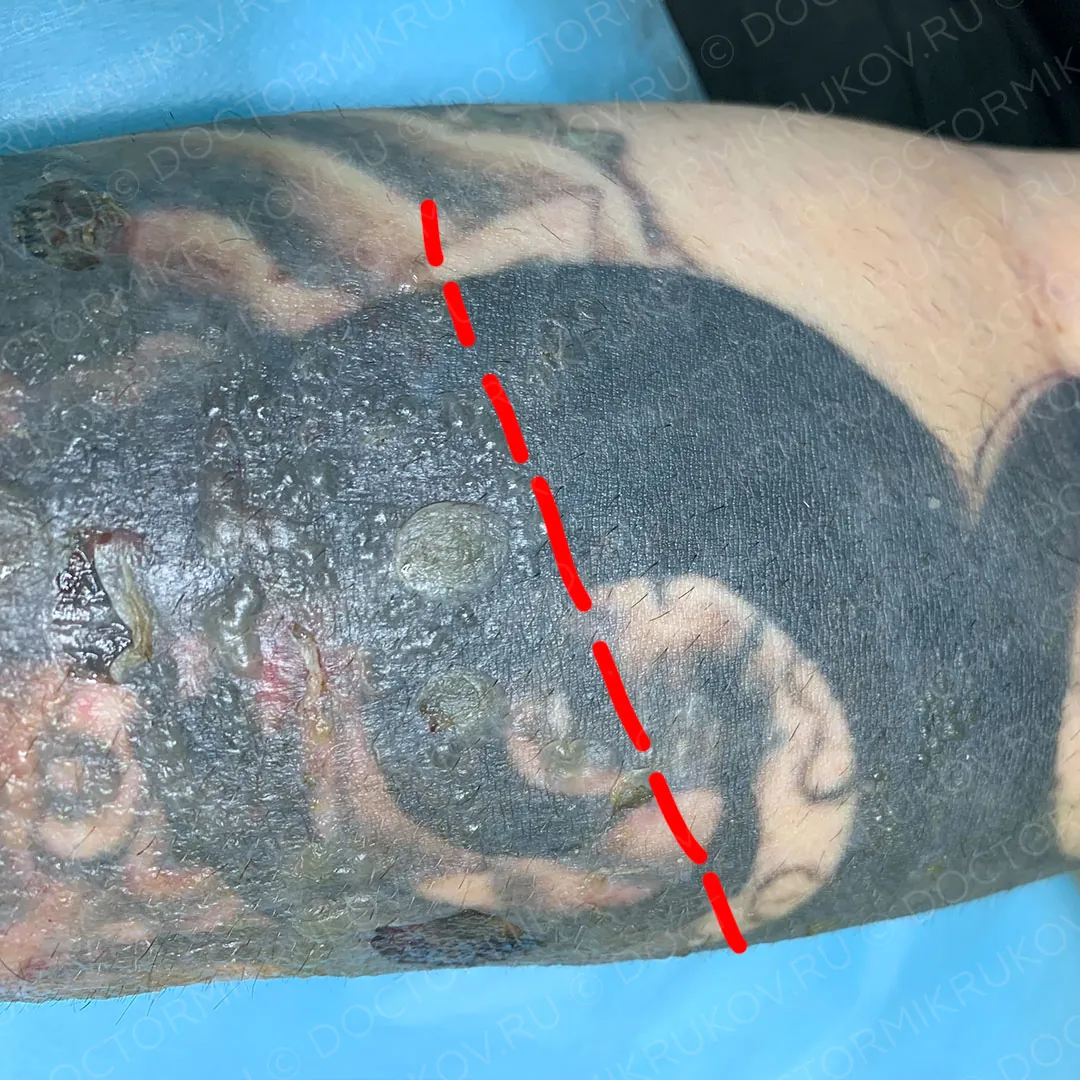
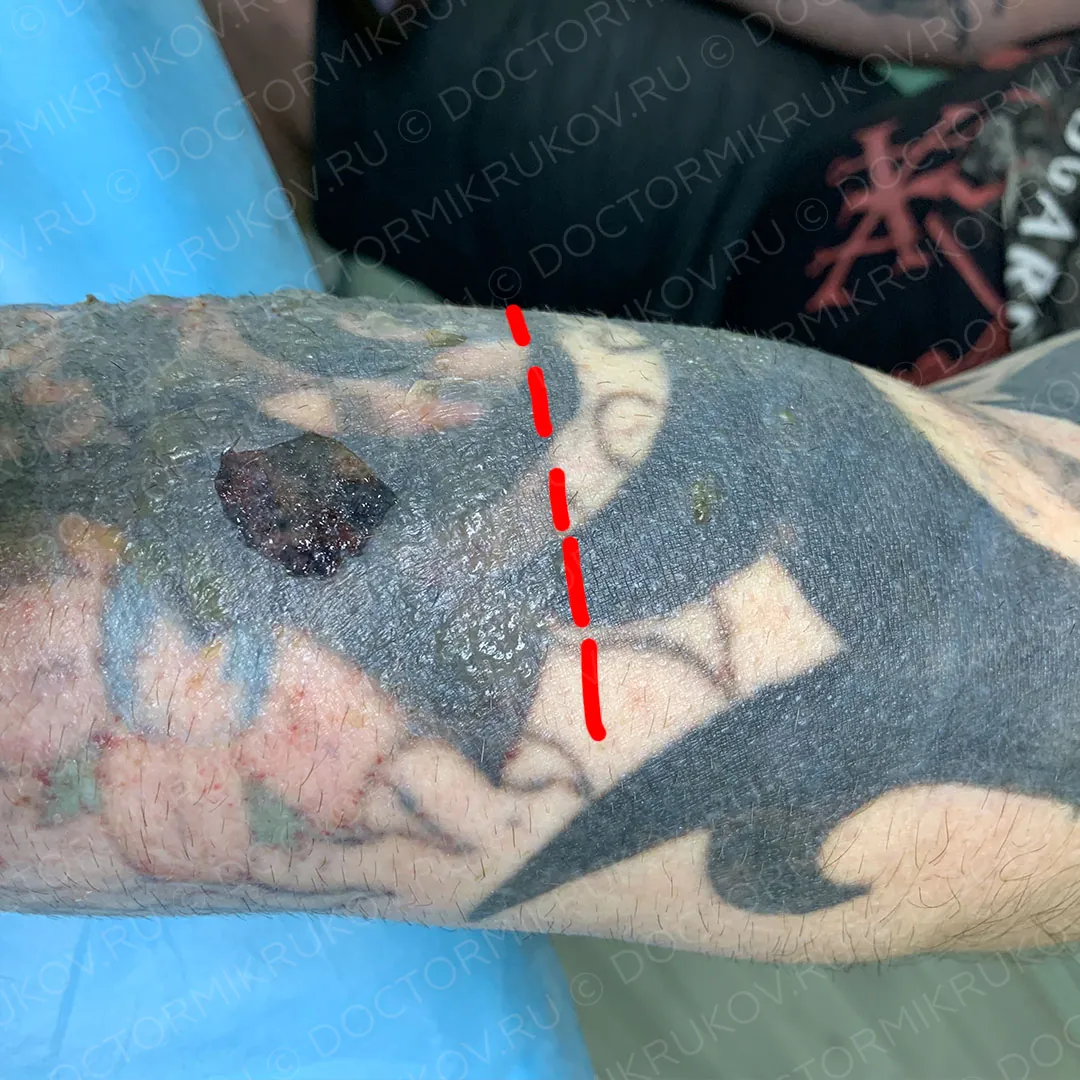
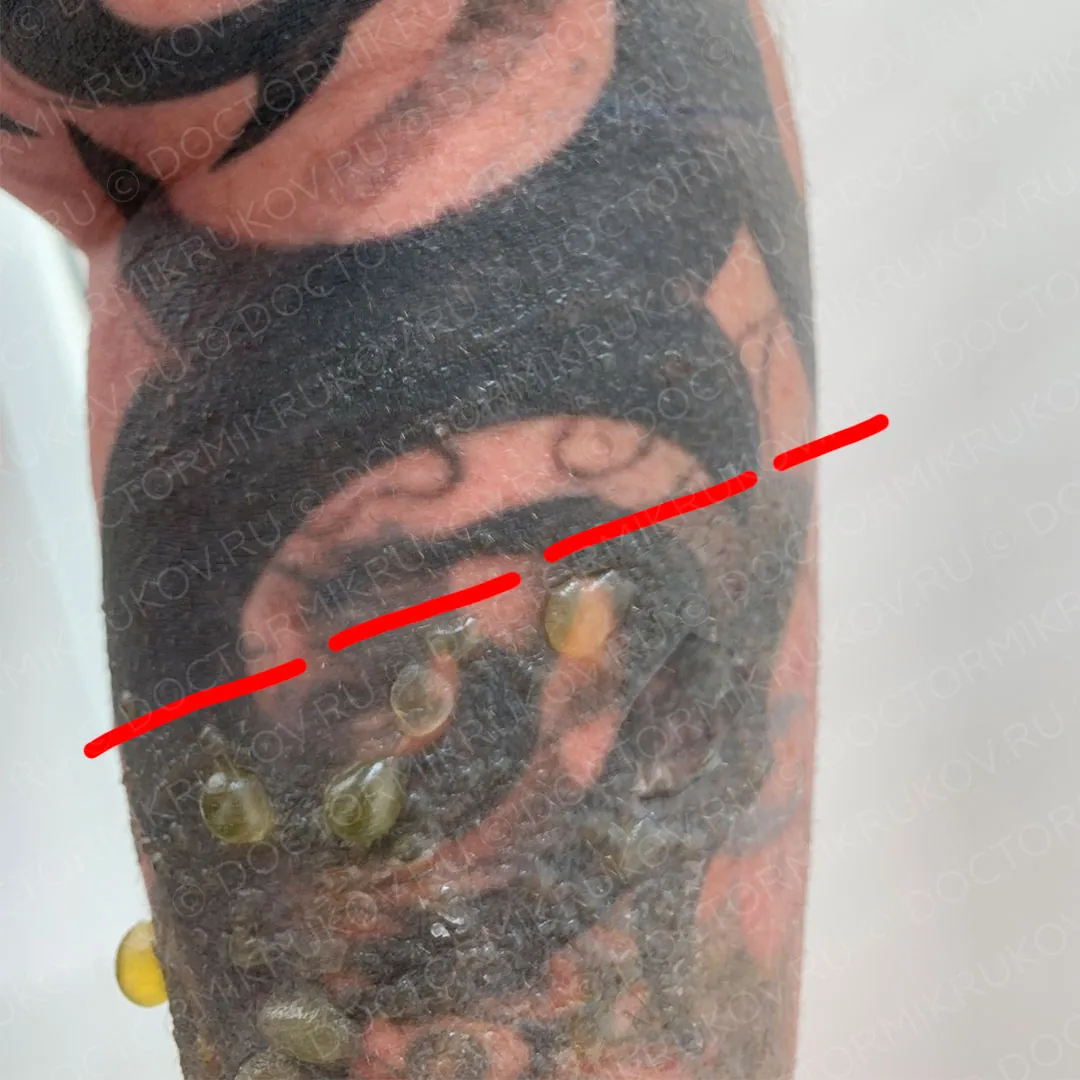
6 hours after the laser treatment the patient called and sent photos of the treated skin showing burns in the form of blisters of different sizes filled with clear yellowish fluid.
Not pleasant at all — a difficult situation, to put it mildly.
I will first tell you what we did, and then share my conclusions from this situation. The patient clearly needed qualified care: dressings were prescribed, along with measures to prevent infectious complications (a secondary infection and purulent inflammation are dangerous, because they worsen the prognosis and increase the likelihood of pronounced scarring). The patient came to the first dressing with some of the blisters already burst on their own. At the dressing, I opened all the large blisters with sterile scissors and released the serous fluid.
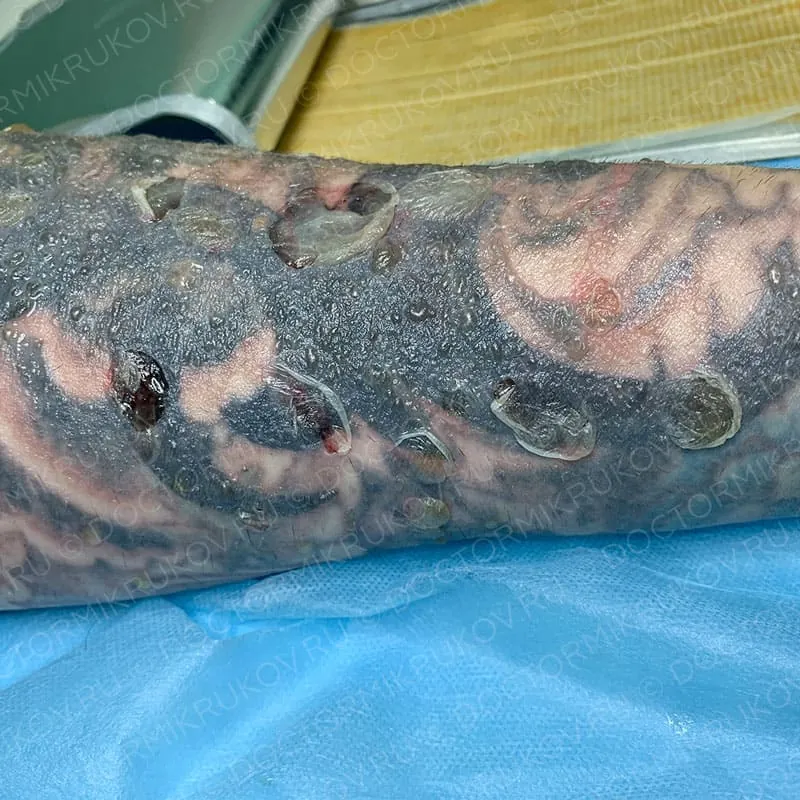
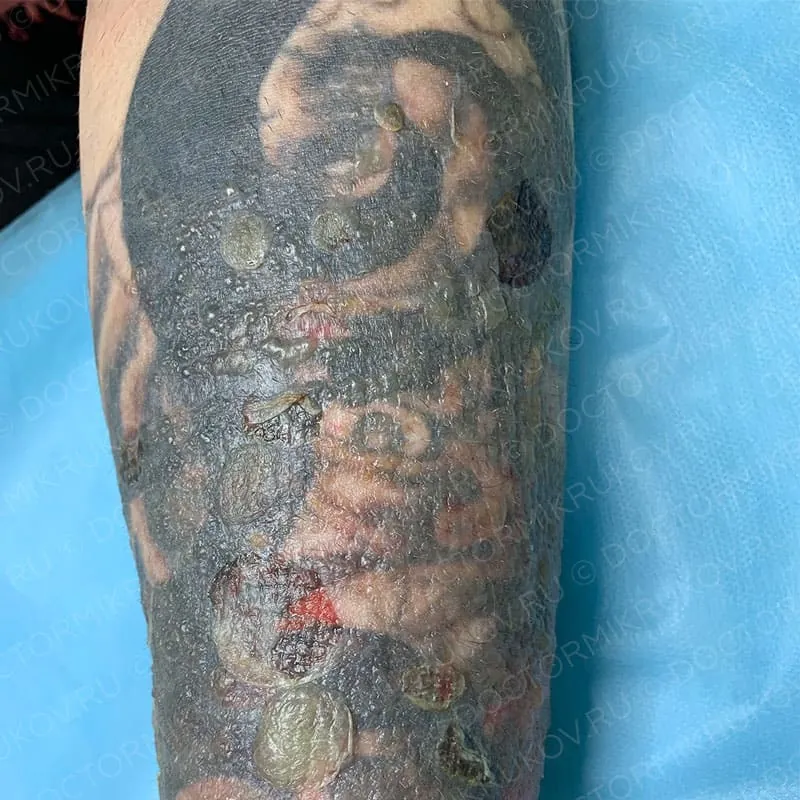
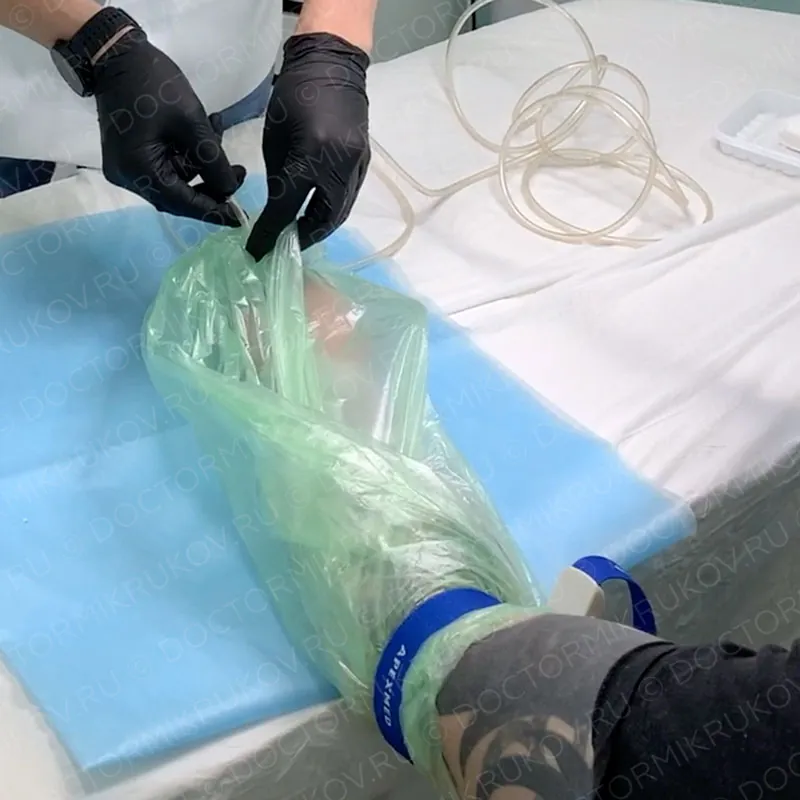
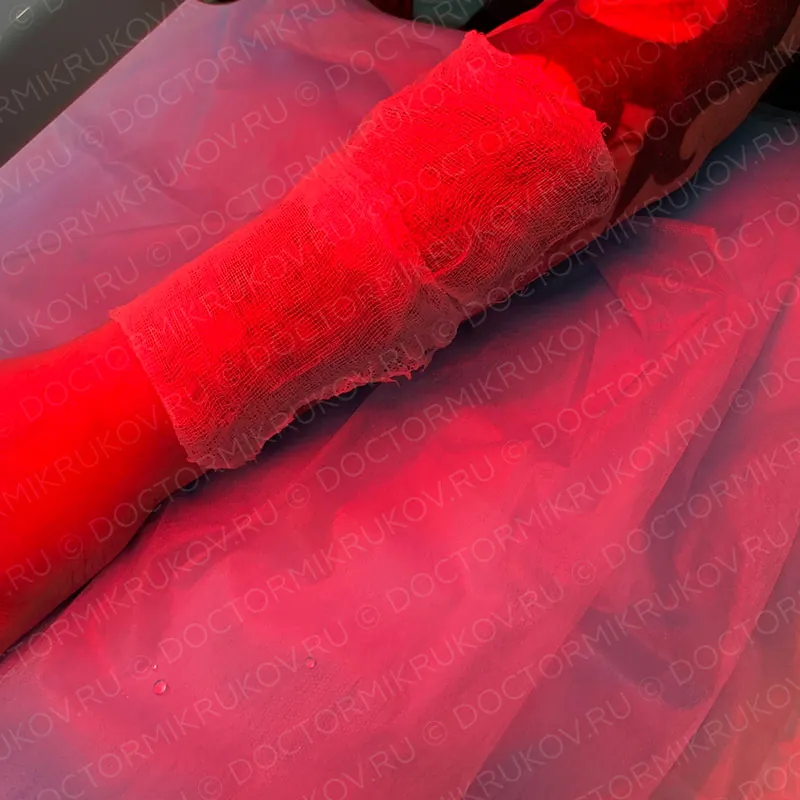
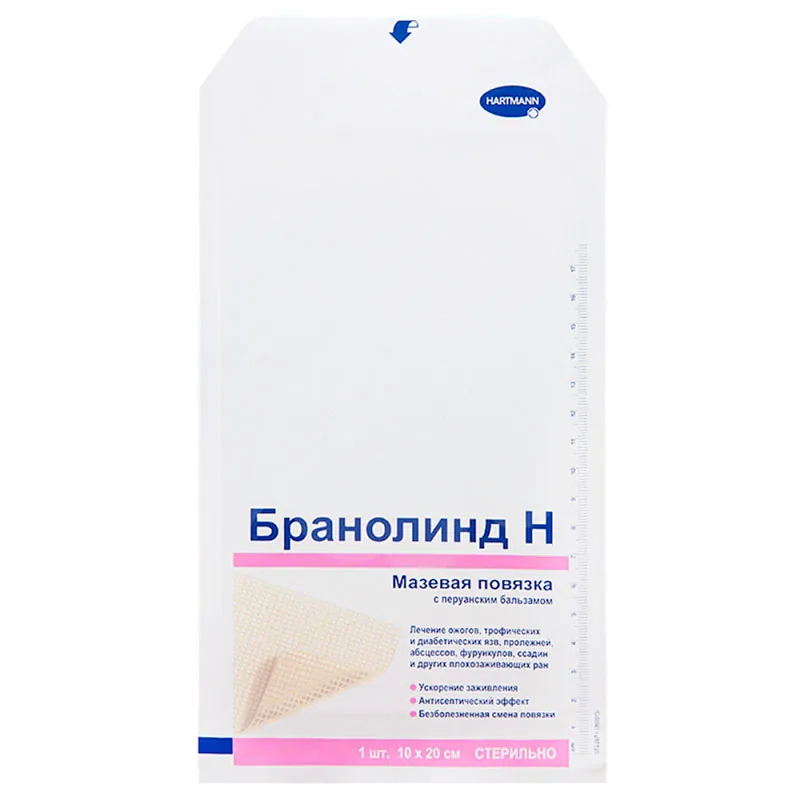
Next we carried out ozone therapy of the whole arm in a chamber, using high concentrations of an ozone-oxygen mixture in a moist environment with saline, for 15–20 minutes, followed by red-light PDT therapy for 15 minutes. After that we applied a Branolind N ointment dressing with Peru balsam (Hartmann) over the whole affected area and secured it with sterile gauze pads and a bandage on top.
The dressings and procedures using this method were carried out daily for the first 5 days, during the phase of inflammation, rejection of necrotic tissue and exudation. No antibiotics were prescribed, either systemic or topical. Progress was positive, and there was no secondary infection.
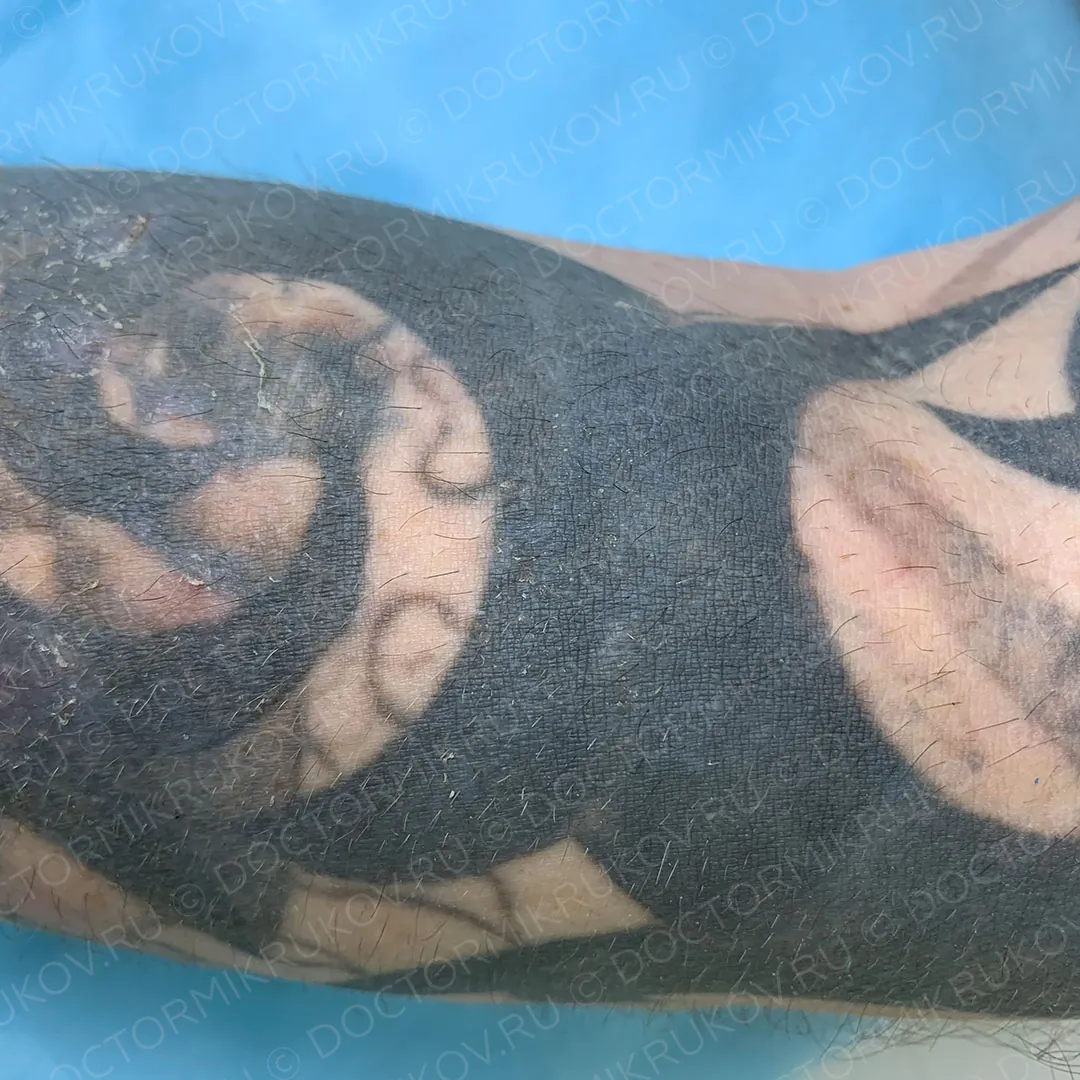
10 days after the injury the patient came in for a check-up. The wounds had partly epithelialised. We managed to prevent scarring despite the critically large extent of skin damage. This was thanks to the chosen approach and the use of combined rehabilitation methods. Usually damage like this is accompanied by a secondary infection; healing drags on, happens by secondary intention and leaves scars of varying severity. In our case we managed to avoid that scenario.
Discussion: why did this happen?
You may have noticed that the burns were not over the whole treated area, and the border of the severe damage can be traced on the skin as a sharply defined line. Moreover, the areas of skin without severe damage contained a lot of pigment and were "saturated" with ink much more heavily than the areas with pronounced burns. Spot overlap covered the whole area of the tattoo, so this factor was taken into account during the procedure.
After careful questioning, we found out that before the procedure the patient had applied a non-certified anaesthetic to the skin of the forearm on their own and left it on for about 50–60 minutes under occlusive film. Looking at the pattern of the damage, I assume that such a strong difference in the severity of the damage and the sharp border were caused by the applied anaesthetic: in the upper part the occlusive film had probably shifted and the anaesthetic had been rubbed off (the exposure was shorter or there was practically none), and the level of damage was much lower. The anaesthetic caused spasm of the vessels in the vascular plexuses of the skin, which ultimately triggered a cascade of events, including reduced blood perfusion, less removal of excess heat, ischaemia and swelling, and all of this led to a pathological inflammatory reaction to the laser, which is not normally seen.
What conclusions did we draw from this case?
- Take a thorough medical history from the patient and ask about anything they have done on their own, including the use of anaesthetics
- Whenever possible, do not use anaesthetics in your practice if you can do without them.
- Always stay alert and analyse the situation, taking into account any facts that could affect the effectiveness and safety of the procedure
In our case this unusual situation ended well, because we have enough knowledge, skills and the necessary resources to provide proper care and keep possible adverse consequences to a minimum.
Laser tattoo removal is not as simple as it seems; it is not just "zapping away a tattoo". Remember that you are working with a living organism and a Class 4 laser. Even with 10 years behind you and thousands of patients, you can always run into an unusual situation, and nobody is immune to complications.
I am grateful for this case, because it made me dig even deeper into burn complications, skin cooling and preventing situations like this. It made me think about the subtler connections between skin structure, laser physics, heat conduction, the physiology of inflammation and the factors that influence cascades of processes in tissues. I am publishing this case so that you do not make the same mistakes! I want you to understand what a responsible job working with lasers is!
Frequently asked questions
What caused the blistering burns after laser tattoo removal in this case?
Before the procedure the patient had applied a non-certified anaesthetic on their own and left it on for about 50–60 minutes under occlusive film. The author assumes it caused spasm of the skin's blood vessels, reduced blood perfusion and less removal of excess heat, which led to a pathological inflammatory reaction to the laser.
How were the burns treated in this case?
The large blisters were opened with sterile scissors, then for the first 5 days dressings, ozone therapy in a chamber, red-light PDT therapy and a Branolind N ointment dressing were done daily. No antibiotics were prescribed, there was no secondary infection, and scarring was prevented.
Should you use an anaesthetic before laser tattoo removal?
The author's conclusion from this case: whenever possible, do not use anaesthetics in your practice if you can do without them. Take a thorough medical history and ask the patient about anything they have done on their own, including the use of anaesthetics.